
Welcome to growing Chillies
If you’re new to growing chillies, you’re in for an exciting adventure! Growing your own chilli peppers might seem daunting at first, but don’t worry – this guide will walk you through every step. Whether you’re dreaming of adding homegrown Scotch bonnets to your hot sauce, spicing up curries with fresh Thai chillies, or simply wanting to experience the joy of nurturing your very first plant from seed to harvest, this beginner-friendly guide will help you succeed. The satisfaction of harvesting your first homegrown chilli is truly unmatched, and with just a few basic supplies and some patience, you’ll be well on your way to becoming a successful chilli grower.
As a newcomer to chilli growing in the UK, one of the most important lessons is timing. Here’s your first key tip: start in January or February. Why? Our UK climate has a shorter growing season than many chilli varieties are used to, so giving your plants an early start is essential for beginners. Don’t worry if this seems early – there’s a good reason! Chilli plants typically need 6-8 months from seed to harvest, which surprises many first-time growers. Many varieties also need extended warm periods to develop their heat and flavour, so this early start ensures your first crop will have the best chance of success during our summer months. Even the mildest varieties benefit from this extended growing period, as it allows them to develop fuller flavours and more abundant crops.
If your first attempt doesn’t go as planned (which is completely normal when you’re learning!), you’ll have time for a second try while staying on schedule. This timing also lets your young plants develop strong roots in the comfort of your home before they face their first experience with British weather. Remember, every experienced chilli grower started exactly where you are now, and each growing season brings new lessons and discoveries. Think of your first year as an exciting experiment – you’ll learn what works best in your specific growing conditions and which varieties suit your taste and space
 Essential Tools for Your Journey
Before embarking on your chilli-growing adventure, gather your supplies: a seed tray with drainage holes, quality seed starting mix(avoiding garden soil, which is too heavy for delicate seedlings), perlite, your chosen chilli seeds, plant labels, a spray bottle with tepid water, a clear plastic dome or propagator lid, and a reliable heat source such as a propagator or heat mat. A small dibber or pencil will help with precise planting. Consider also having chamomile tea or Aloe Vera solution on hand for seed preparation.
Preparing Your Seeds
The journey begins with giving your seeds the best possible start. First, place them in a sealed container in the fridge for 2-3 days – think of it as a mini winter simulation, particularly beneficial for stubborn varieties like habaneros. After their cold treatment, it’s bath time. Soak them in room temperature water (21°C) for 12-24 hours. Don’t worry if they float initially; they’ll usually sink as they absorb water. For an extra boost, consider using cooled chamomile tea with its natural antifungal properties, or a gentle Aloe Vera solution (one tablespoon of pure gel per cup of water). Always finish with a clean water rinse before planting.
Mix your growing medium by combining 70% seed starting mix with 30% perlite. This light, airy mixture ensures proper drainage while retaining enough moisture for germination. Fill your seed trays to about 1cm from the top, tapping gently to settle the mix without compressing it. The medium should feel like a wrung-out sponge – consistently damp but never waterlogged.
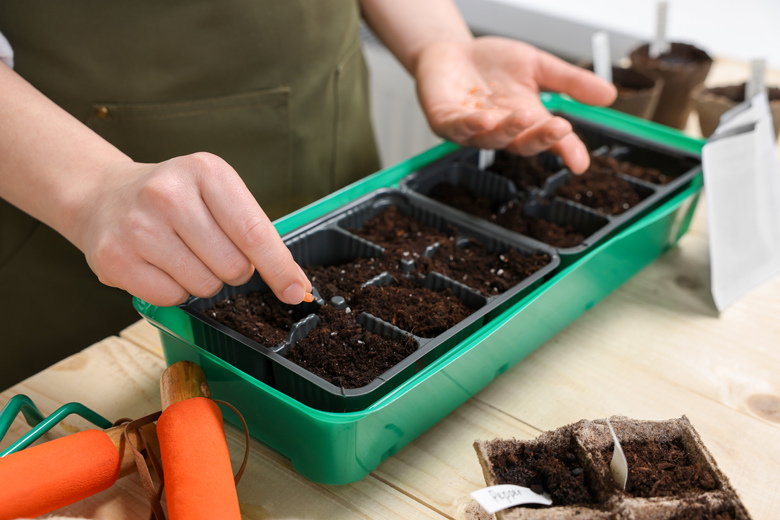
The Planting Process
Make holes about 5mm deep, spacing them 10mm apart. Plant 1-2 seeds in each hole . Cover lightly with soil or vermiculite, maintaining that crucial balance of protection while allowing enough air flow for germination. Label everything clearly – you’ll thank yourself later when different varieties start emerging.
Give the surface a gentle mist with your spray bottle, then create your mini greenhouse environment with the dome or propagator lid. Maintain a consistent temperature between 26-32°C (79-90°F) – this warmth is essential for successful germination.
Watch for emergence over the next 7-14 days, though some varieties might take up to three weeks. When seedlings appear, remove the dome immediately and ensure they receive plenty of light to prevent leggy growth. Once you spot the second set of true leaves, begin weekly feeding with diluted fertilizer. A gentle fan nearby will strengthen stems and improve air circulation – think of it as your plants’ daily exercise routine.
Once your seedlings have reached this stage, they’ll soon need more room to grow. When you notice roots beginning to peek through the drainage holes, usually around 3-4 weeks after sprouting, it’s time to repot them into larger containers (about 9-13cm pots). Use a well-draining potting mix and handle the delicate seedlings gently by their leaves rather than stems to prevent damage. After repotting, keep them in their protected indoor environment for another few weeks until they’re established and growing strongly.
Around May, when the risk of frost has passed, you can begin the hardening off process. This crucial step helps your plants adjust gradually to outdoor conditions. Start by placing them outside for just an hour or two in a sheltered spot, gradually increasing the time over 7-10 days. Avoid direct sunlight initially and bring them in at night. Watch the weather forecast carefully during this period – even a slight frost can damage your young plants. Once fully hardened off, they can either be planted in their final outdoor positions or moved to their permanent container homes.
Troubleshooting Common Challenges
Watch for signs of trouble: stretched, spindly seedlings indicate insufficient light; seeds failing to sprout often means inadequate warmth; and seedlings suddenly falling over suggests damping off disease, which can be prevented with good air circulation and careful watering practices. Remember that problems caught early are usually easily remedied.
Remember, growing chillies is a journey of patience and learning. Each season brings new insights and better results. With consistent care and attention, you’ll soon be harvesting your own homegrown chillies, adding both heat and satisfaction to your cooking throughout the year