Chilli Seed Soaking guide

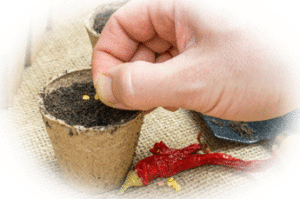
Mastering Seed Soaking

The journey from seed to seedling is perhaps the most crucial phase in a chilli plant’s life cycle. During this period, the tiny seed must transform from its dormant state into a living, growing organism – a process that can be challenging and, at times, unpredictable. Many growers face common obstacles: seeds that refuse to germinate, slow sprouting times, or inconsistent results across different varieties. These challenges have led to the development and refinement of pre-soaking techniques, which have proven particularly valuable for those working with older seeds or harder-to-germinate varieties.

The practice of seed soaking draws inspiration from nature itself. In the wild, chilli seeds often pass through birds or other animals, where digestive processes help break down the seed coat. They then lie dormant until environmental conditions – including adequate moisture – signal that it’s time to grow. By pre-soaking our seeds, we’re essentially replicating these natural processes in a controlled environment, giving our plants the best possible start in life.

Pre-soaking chilli seeds serves multiple purposes. The process softens the hard outer shell of the seed, making it easier for the emerging seedling to break through. Additionally, soaking helps remove any germination-inhibiting compounds present on the seed coat and signals to the seed that growing conditions are favourable. The soaking process also initiates important metabolic activities within the seed, activating enzymes that begin breaking down stored nutrients that will fuel the early stages of growth. This pre-germination boost can be particularly beneficial for older seeds or varieties known to have thick seed coats, such as ghost peppers or scotch bonnets. Water absorption during soaking also helps to rehydrate the cellular structures within the seed, essentially ‘waking up’ the dormant embryo and preparing it for growth.

Read more

Growing Stages: From Chilli Seed to Seedling

Introduction

Growing chillies from seed is a rewarding journey that transforms tiny seeds into productive, flavour-packed plants. Whether you’re planning to grow mild varieties like Poblano or face-melting super-hots like the Carolina Reaper, understanding the germination process and early growth stages is crucial for success. This guide walks you through the critical phases of chilli plant development, from the moment the seed awakens to the essential early feeding stages that set the foundation for healthy, vigorous plants. By following these guidelines and providing the right conditions, you’ll be well on your way to growing thriving chilli plants that will reward you with a bountiful harvest.

The journey of growing chillies requires patience and attention to detail,particularly during the crucial early stages. Each tiny seed contains everything needed to produce a healthy plant, but success depends on providing the right conditions at the right time. Understanding the biology behind seed germination and early growth will help you avoid common pitfalls and maximize your chances of raising strong, productive plants. The margin for error during these early stages is small – even minor variations in temperature, moisture, or light can significantly impact development. By mastering these fundamentals and learning to read the subtle signs your seedlings provide, you’ll be better equipped to nurture them through their most vulnerable period of growth.

Whether you’re growing chillies indoors or in a greenhouse, the principles remain the same. The key is to create an environment that mimics the natural conditions these plants have evolved to thrive in. From maintaining consistent moisture during germination to providing adequate light and nutrients as the seedlings develop, each step builds upon the last to create the foundation for healthy, productive plants.

Read more

Quick Chilli Seed germination

Giving seeds the best start

For many chilli enthusiasts, the journey from seed to seedling represents one of the most challenging and rewarding aspects of  Chilli  cultivation. The tiny seeds of capsicum plants contain within them the potential for months of abundant harvests and complex flavours. Getting these seeds to consistently sprout can prove frustrating even for experienced growers, particularly with rare varieties and superhot peppers where each seed carries significant value.

Whilst chilli seeds will naturally germinate given the right conditions, several time-tested techniques can dramatically improve success rates and reduce the time from planting to emergence. These methods take advantage of the seeds’ natural responses to environmental signals, mimicking conditions they would experience in their native habitats. Through careful manipulation of moisture, temperature, and environmental cues, growers can create optimal conditions that encourage even stubborn seeds to spring to life.

The combination of cold stratification and specialised soaking solutions provides a powerful approach to breaking seed dormancy and triggering the germination process. This guide explores both traditional techniques passed down through generations and modern approaches backed by horticultural science. Whether starting your first batch of jalapeños or preparing to grow rare superhot varieties, these methods will help ensure your chilli growing journey begins with strong, healthy seedlings. These techniques can be adapted and refined based on individual growing conditions and specific variety requirements.

Read more

Essential UK Guide: Growing Your First Chillies

Welcome to growing Chillies

If you’re new to growing chillies, you’re in for an exciting adventure! Growing your own chilli peppers might seem daunting at first, but don’t worry – this guide will walk you through every step. Whether you’re dreaming of adding homegrown Scotch bonnets to your hot sauce, spicing up curries with fresh Thai chillies, or simply wanting to experience the joy of nurturing your very first plant from seed to harvest, this beginner-friendly guide will help you succeed. The satisfaction of harvesting your first homegrown chilli is truly unmatched, and with just a few basic supplies and some patience, you’ll be well on your way to becoming a successful chilli grower.

As a newcomer to chilli growing in the UK, one of the most important lessons is timing. Here’s your first key tip: start in January or February. Why? Our UK climate has a shorter growing season than many chilli varieties are used to, so giving your plants an early start is essential for beginners. Don’t worry if this seems early – there’s a good reason! Chilli plants typically need 6-8 months from seed to harvest, which surprises many first-time growers. Many varieties also need extended warm periods to develop their heat and flavour, so this early start ensures your first crop will have the best chance of success during our summer months. Even the mildest varieties benefit from this extended growing period, as it allows them to develop fuller flavours and more abundant crops.

If your first attempt doesn’t go as planned (which is completely normal when you’re learning!), you’ll have time for a second try while staying on schedule. This timing also lets your young plants develop strong roots in the comfort of your home before they face their first experience with British weather. Remember, every experienced chilli grower started exactly where you are now, and each growing season brings new lessons and discoveries. Think of your first year as an exciting experiment – you’ll learn what works best in your specific growing conditions and which varieties suit your taste and space

Read more

Spicy Moroccan lamb tagine

Home | Blog

Traditional Tagine with a Fiery Fusion Twist

There’s something magical about the moment you lift the cone-shaped lid of a tagine. Steam rises in aromatic swirls, carrying with it the promises of tender meat and complex spices that have been slowly mingling for hours. While traditional Moroccan tagines rely on warm spices rather than heat, our contemporary version adds carefully chosen chillies to create an exciting new dimension of flavour.

Picture succulent pieces of lamb shoulder, so tender they yield to the gentlest pressure of a fork, swimming in a rich sauce that balances sweet, sour, and spicy notes. Fresh red chilies and a scatter of dried chili flakes bring warmth that builds gradually, while preserved lemons add bright citrus notes and honey-sweet apricots provide a natural sweetness that perfectly complements the meat. Underneath it all, the classic Moroccan spice blend ras el hanout provides a foundation of warm spices – cinnamon, cumin, coriander, and more – that reminds us of this dish’s noble heritage.


Spicy Moroccan lamb tagine
 
Author: 
Nutrition Information
  • Serves: 6 generous portions
  • Serving size: 350 grqms
  • Calories: 785
  • Fat: 20 grams
  • Saturated fat: 16 grams
  • Unsaturated fat: 2 grams
  • Carbohydrates: 60 g
  • Sugar: 21 grams
  • Sodium: 3462 mg
  • Fiber: 5 g
  • Protein: 77 g
  • Cholesterol: 128 mg
Recipe type: Dinner
Cuisine: Moroccan
Prep time: 
Cook time: 
Total time: 
There's something magical about the moment you lift the cone-shaped lid of a tagine. Steam rises in aromatic swirls, carrying with it the promises of tender meat and complex spices that have been slowly mingling for hours. While traditional Moroccan tagines rely on warm spices rather than heat, this contemporary version adds carefully chosen chilies to create an exciting new dimension of flavor. The slow cooking process allows the chilies to mellow and meld with classic tagine ingredients like preserved lemons, honey-sweet apricots, and aromatic spices, creating a rich, complex dish that honors traditional techniques while adding a subtle but distinctive heat.
Ingredients
  • 1.2kg lamb shoulder, cut into large chunks
  • 3 red chilies, 2 finely chopped, 1 left whole (adjust to taste)
  • 1 teaspoon dried chili flakes
  • 2 large onions, finely chopped
  • 4 garlic cloves, minced
  • 2-inch piece fresh ginger, grated
  • 2 tablespoons ras el hanout
  • 2 teaspoons ground cumin
  • 2 teaspoons ground coriander
  • 1 cinnamon stick
  • 2 tablespoons clear honey
  • 2 tablespoons tomato paste
  • 2 preserved lemons, quartered
  • 200g dried apricots
  • 100g green olives, pitted
  • 500ml lamb or chicken stock
  • 3 tablespoons olive oil
  • Large bunch fresh coriander
  • Salt and black pepper to taste
Instructions
Method:
  1. Mix the lamb with half the ras el hanout, 1 teaspoon each of cumin and coriander, salt, and pepper. Leave to marinate for at least 30 minutes, preferably longer.
  2. Heat oil in a tagine or heavy-based casserole over medium-high heat. Brown the marinated lamb in batches until golden all over. Remove and set aside.
  3. Lower heat and sauté onions until soft and translucent (about 8 minutes). Add garlic, ginger, chopped chilies, and remaining spices. Cook for 2 minutes until fragrant.
  4. Return lamb to the pot. Add tomato paste, whole chili, chili flakes, honey, and stock. Bring to a simmer, cover, and cook on low heat for 1.5 hours.
  5. Add preserved lemons and apricots. Continue cooking for 45 minutes.
  6. Add olives and cook for a final 15-20 minutes until lamb is meltingly tender and sauce has thickened.
  7. Remove whole chili. Adjust seasoning, scatter with fresh coriander.
To Serve:
  1. Accompany with couscous or flatbread, and a fresh herb salad. For those who enjoy extra heat, serve harissa paste on the side.
Notes
Tips:

Ask your butcher to cut the lamb into large chunks - they'll do a neater job
The tagine tastes even better the next day
Adjust the amount of chillies to suit your heat preference
For best results, use a proper tagine pot or heavy-based casserole with a tight-fitting lid


Korean Chilli varieties

Home | Blog

Kimchi made with Chillies in Korean cooking

Korean Chilli Varieties: A Comprehensive Guide

In Korean cuisine, chilli peppers (gochu) come in distinct varieties that each serve specific culinary purposes. The basic classification distinguishes between put-gochu (풋고추), young green chillies prized for their fresh flavour, and hong-gochu (홍고추), the mature red chillies that develop a deeper, complex taste. The term cheong-gochu (청고추) encompasses various green chilli varieties.

The Cheongyang chilli (청양고추), a hybrid between Jeju Island's local variety and Thai chillies, delivers significant heat at 10,000 Scoville Heat Units (SHU). Whether used fresh in stir-fries or dried into gochugaru, it's essential in dishes like gochujang eomuk bokkeum. Meanwhile, the wrinkled, compact kkwari-gochu (꽈리고추), also known as Shishito, offers a milder heat at 1,000 SHU and features prominently in dishes like myulchi bokkeum and jangjorim.

Most varieties flourish as summer crops, with different regions producing distinct flavour profiles due to variations in soil and climate. This diversity of chillies, developed through centuries of selective breeding, forms the backbone of Korean cuisine's distinctive spice profile, demonstrating the sophistication of Korean culinary traditions and their deep understanding of how different chilies contribute to a dish's character.

The preservation and cultivation of these distinct chilli varieties remains a point of pride in Korean agriculture, with many regions hosting annual festivals celebrating their local varieties. These events not only showcase traditional farming methods but also highlight the crucial role these peppers play in Korean food culture, from home kitchens to industrial production. Farmers often pass down specialized growing techniques through generations, maintaining the unique characteristics that make each variety distinct and irreplaceable in Korean cuisine.

What is Gochugaru ?

Home | Blog

The Heart and Heat of Korean Cuisine: A Deep Dive into Gochugaru

Few ingredients capture the essence of Korean cooking quite like gochugaru (고추가루). These vibrant red pepper flakes are more than just a source of heat – they’re the soul of dishes like kimchi, tteokbokki, and countless Korean stews. Unlike the crushed red pepper flakes you might find at a pizza parlour, gochugaru offers a complex flavour profile that balances sweet, smoky, and spicy notes in perfect harmony.

Traditional gochugaru is made from Korean red chillies (gochu) that are dried in the sun before being coarsely ground. The best varieties come from  Chillies grown in rural Korean regions like Yeongyang, where the climate and soil create ideal conditions for developing the  Chillies’ distinctive taste. These flakes range in colour from deep burgundy to bright red, with a texture that’s coarser than cayenne but finer than typical crushed red Chilli. The drying process is particularly crucial, typically taking place during late summer and early autumn when warm winds and abundant sunshine help develop the Chillies’ characteristic sweetness. Farmers often tend to these drying  Chillies multiple times a day, rotating them carefully to ensure even exposure and prevent any moisture-related degradation that could compromise their quality.

What makes gochugaru special is its versatility. When it meets oil, it creates a rich paste that forms the backbone of many Korean marinades. In soups and stews, it slowly releases its colour and flavour, turning the broth into a beautiful crimson. And in kimchi, it works alongside fermentation to develop deep, complex flavours that can’t be replicated with any other spice.

When shopping for gochugaru, look for packages labeled “taeyangcho” (태양초), indicating the  Chillies were sun-dried rather than machine-dried. The colour should be vibrant and consistent, without any dark spots or discolouration. Store it in an airtight container in your freezer to maintain its freshness and prevent clumping – properly stored, it can last up to a year while maintaining its distinctive flavour profile.

Authentic Irish Fisherman’s stew

Spicy seafood stew

From the rugged Irish coastline comes this hearty fisherman’s stew, a dish born from the tradition of cooking the day’s catch at sea. Unlike its Mediterranean cousins, this Celtic version brings together the bounty of the North Atlantic with an unexpected twist – the warming kick of fresh chillies. This humble yet luxurious one-pot meal tells the story of resourceful fishermen who knew that the freshest seafood needs little more than careful cooking and thoughtful seasoning to shine.

While traditional Irish cuisine isn’t typically associated with spice, this dish represents a beautiful evolution of classic seafood cookery. The combination of rich fish stock, sweet tomatoes, and the gentle heat of chillies creates a perfectly balanced broth that allows each type of seafood to maintain its distinct character while contributing to the overall depth of flavor.

What makes this stew special is its adaptability – originally made with whatever came up in the nets, today’s version can be crafted with any mix of seafood available at your local market. Whether you’re using Atlantic cod, plump mussels, or tender squid, the key lies in the layered addition of ingredients and the respect for each component’s cooking time. The result is a celebration of the sea – a warming, satisfying meal that’s equally at home on a fisherman’s boat or your dinner table.

Authentic Irish Fisherman's stew
 
Author: 
Nutrition Information
  • Serves: 8
  • Serving size: 400 gr
  • Calories: 310
  • Fat: 12 grams
  • Saturated fat: 5 grams
  • Unsaturated fat: 2 grams
  • Carbohydrates: 15 grams
  • Sugar: 3 grams
  • Sodium: 953 mg
  • Fiber: 3 grams
  • Protein: 30 grams
  • Cholesterol: 90 m
Recipe type: Seafood
Cuisine: Irish
Prep time: 
Cook time: 
Total time: 
From Ireland's rugged coastline comes a hearty fisherman's stew, celebrating the Atlantic's finest catches. While different from Ireland's famed meat stews, this coastal dish has been a staple in Irish fishing communities for generations, making the most of the daily harvest from pristine waters. The combination of firm white fish, plump mussels, tender squid, and sweet prawns, all gently cooked in a rich broth with garden vegetables and a splash of white wine, captures the essence of Irish coastal cooking.
Ingredients
  • 500g firm white fish (haddock, cod or monkfish), cut into chunks
  • 12 mussels, cleaned and debearded
  • 8 large prawns, shell on
  • 200g squid rings
  • 12 clams, cleaned
  • 2 medium onions, finely diced
  • 4 garlic cloves, minced
  • 3 fresh red chillies, finely chopped (adjust to taste)
  • 2 celery stalks, finely diced
  • 2 carrots, diced
  • 400g chopped tomatoes
  • 1 liter rich fish stock
  • 120ml dry white wine
  • 2 bay leaves
  • Fresh parsley, chopped
  • Salt and freshly ground black pepper
  • 3 tablespoons olive oil
  • 1 lemon, cut into wedges
Instructions
  1. Heat olive oil in a large heavy-based pot over medium heat. Add onions, celery, and carrots. Cook until softened (about 5 minutes).
  2. Add garlic and chillies, cook for another 2 minutes until fragrant.
  3. Pour in the white wine, let it bubble and reduce by half (about 3 minutes).
  4. Add chopped tomatoes, fish stock, and bay leaves. Bring to a simmer and cook for 15 minutes to let flavours develop.
  5. Add the firm white fish pieces and squid rings. Simmer for 3 minutes.
  6. Add mussels and clams. Cover and cook for 2-3 minutes until they start to open.
  7. Add the prawns and cook for a final 2-3 minutes until they turn pink and the shellfish is fully opened.
  8. Season with salt and pepper to taste.
  9. Discard any shellfish that haven't opened and remove bay leaves.
  10. Scatter with fresh parsley and serve hot with lemon wedges and crusty bread.
Notes
The freshness of seafood is crucial for this dish
Fish stock can be homemade or bought, but should be good quality
Seafood can be varied according to availability
The stew should be brothy rather than thick
Adding seafood in stages ensures nothing gets overcooked


Nachos and cheese. A great snack

Home | Blog

Crispy tortillas & cheese

Nachos and cheese: a beloved Tex-Mex classic that’s perfect for casual gatherings, film nights, or anytime you’re craving a delicious, cheesy snack. This simple yet satisfying dish originated in Mexico and has become a staple of casual dining and home cooking across North America and, increasingly, in the UK.

At the heart of great nachos is the interplay between crispy tortilla chips, gooey melted cheese, and the kick of chillies. Chillies are an essential component of Mexican and Tex-Mex cuisine, adding both heat and depth of flavour. From mild poblanos to fiery habaneros, the world of chillies offers a spectrum of tastes to suit every palate. In our recipe, we suggest jalapeños for a moderate heat, but feel free to experiment with different varieties to find your perfect balance of flavour and spiciness.

Our recipe offers a basic version that you can easily customise to suit your tastes. The foundation is a layer of crispy tortilla chips generously covered with melted cheese and  chillies. From there, you can add a variety of toppings to create your perfect nacho experience. Whether you prefer them simple or loaded with extras, this versatile dish is sure to please.

One of the best things about nachos is their flexibility. You can make them as a quick snack or expand them into a heartier meal by adding proteins like seasoned minced beef, shredded chicken, or black beans. The chilli heat can be adjusted to your liking, making it easy to cater to different preferences when serving a crowd.

Read more

What is in chipotle sauce ?

Smoked Jalapenos

The Chipotle sauce is a must-have for fans of Mexican and Tex-Mex food. Well, you can’t go wrong drizzling it over burritos, tacos, rice bowls, or dipping in it—this smoky, spicy sauce is a signature flavour that has crowned it a staple in many kitchens. These dishes have become so damnably popular in Texas and surrounding states, helping to introduce the unique smoky-spicy flavour of chipotle to a wider American audience.

Chipotle sauce is deeply rooted in traditional Mexican cooking. Chipotle peppers are the integral ingredient and have been in use, with records going at least back to the time of the Aztecs. In reality, chipotle peppers are just the smoked and dried versions of the jalapeños, and pre-Columbian Mexico practiced this preservative practice. This practice of smoking and drying jalapeños to form chipotles was adopted back in pre-Columbian times in Mexico, where they have long been used to add depth and complexity to sauces, marinades, stews, and other traditional dishes.

Well, the star of the show in this Chipotle sauce is, without question, the chipotle pepper. Essentially, chipotles are just smoked and dried jalapeño peppers that give that signature smoky, spicy flavour in a sauce. The amount may vary in this or that recipe, but they are always there. Flavourful, spicy-smoky chipotle peppers have become one of the staple elements in Mexican cuisine for generations of cooks, imbuing their sort of character into dishes of great diversity.

Aside from the chipotle peppers themselves, it also includes the adobo sauce the peppers are typically canned in. Adobo sauce is a tangy combination of tomato, vinegar, garlic, and other seasonings that pairs very well with the chipotle peppers. But adobo sauce is part of traditional Mexican cooking as well, offering a tangy, complex base to many sauces and marinades