Rocoto Chilles. 3rd potting on

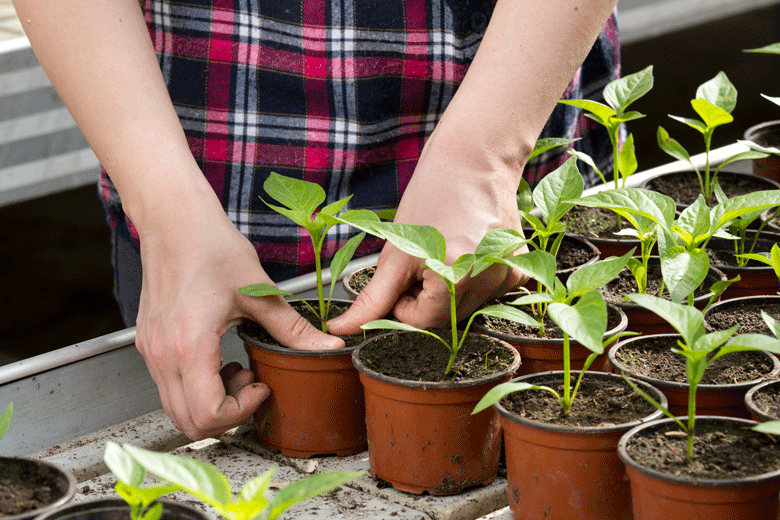
Third potting on of a Rocoto

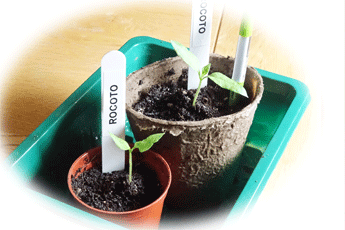
Rocky, the tallest of my Rocotos, has been potted on again.  This is his third repotting. His first was done in mid-December, when he was two inches tall. He was transplanted into 50 mm pots. A couple of weeks later, when he was three inches tall, he was potted on for the second time. He has now reached 4 inches tall, so has been potted into a 130 mm (one litre) pot. I followed the principles of my same size as pot rule to determine the correct time for potting on this Rocoto Chilli plant.

Rocco, another Rocoto, will also be potted on shortly. He is about three inches.
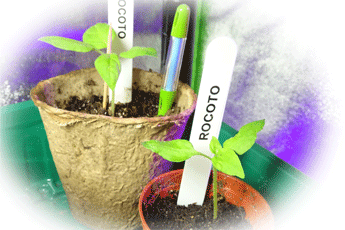
The rest still have a while to go, but I can see these Rocotos being potted on in the next couple of weeks.

I have been impressed with how quickly my Rocotos have grown. They were planted in late November 2021. In addition to the ones mentioned above, all are at least two inches tall. When comparing them with other Chillies that were started at the same time or even earlier, they definitely stand out. They seem healthier and more robust than most of my other plants. This however is apparently not that uncommon. Rocotos are known to be cold weather resistant plants. They are also said to be exceptionally resistant to, resistant to diseases, infections, and pests. These are tough Chilli plants that can take a punch. There is no doubt about that!

With the biggest of my Rocotos already this big, it has got me thinking what will happen down the line. Come May, when I start hardening off, these plants will be far bigger. I don’t envisage these Rocoto Chilli plants being potted on again before then. However, once they are hardened off, I will have to decide on the size of the containers I will pot them on into.  Once I have done the final potting on, I will place the Rocotos outside for the rest of the season.

Read more

Scarification of seeds

What is scarification?

Scarification is the process in which various techniques prepare seeds for faster germination. It involves intentionally damaging the outer seed coat by abrasion, soaking, and other methods to aid seeds to germinate more quickly.

Nature equips seeds with a tough outer coat. This shell protects the “baby plant” inside the coat from harsh conditions. It is waterproof and gas-proof. It protects the seed during winter freezes and flooding. It also protects the seeds from heat and from being trodden on by wildlife and humans.

Most seeds enter a period of dormancy during winter. During this period, there can be fluctuations in temperature due to freezing and thaws. These fluctuations cause the seeds shell to expand and contract. Over time, this will weaken the outer coat. Come spring, when the seed is ready to germinate, it will have been naturally scarified to sprout

Birds are also a source of natural seed scarification. They often eat Chillies before migrating. The seeds pass through the birds digestive system and are exposed to digestion acids that thin the seed shell. When the bird makes a dropping, the seeds fall to the ground well prepared for germination. This method of seed dispersal is particularly efficient, because the seed is not only prepared by the acid scarification, but also has been provided with a ready source of fertilizer

When growing Chillies at home, we have to give seeds a helping hand. After all, they are in a protected environment and will not be subjected to the harsh conditions they would normally face in the wild. To do this, we can employ various techniques to scarify seeds. These techniques include scratching the seeds with sandpaper or using a nail clipper to nip off a piece of seed. Some growers even use their teeth to crack seeds. However, these methods are pretty finicky. Particularly as Chilli seeds are so small. It is far better to soak seeds to achieve the same objective.

Read more

Top tips for growing Chillies

Great tips for growing Chillies

Growing Chillies is a great hobby, but it is not without its challenges. Just when you think you have everything nailed, something else pops up. If it’s not that you have overwatered your Chillies. It’s that you have let them dry out. If it’s not problems with pests, it’s yellowing of leaves or ripening complications, etcetera, etcetera, etcetera. It’s what makes it fun.

I have been growing Chillies for about eight years now. While I am no expert by any sense of the imagination, I have learned quite a bit about growing them. Much of my knowledge has been gained by doing research, but I have also developed my growing skills through simply growing Chillies. I figure things out as they happen. It’s probably been the best way to learn

In my years of growing Chillies, certain things stand out repeatedly. These are the fundamentals of growing these plants. Get them wrong, and you will not be successful. For example, the fact that Chillies don’t like too much water is something that is virtually written in stone. Another fundamental principle is that Chillies, as a general rule, grow better in warm weather. These and other considerations go to the very core of growing Chillies successfully

I want to share some of my top tips for growing Chillies in this post. It will give advice on what precautions to take, provide solutions, and recommend how to avoid some of the most common problems I have encountered in growing Chillies

Read more

How Chilli seeds germinate

The journey of a seed to seedling

There are few things as impressive as planting a Chilli seed and then watching it burst into life. Seed germination is one of nature’s wonders. It is fascinating. However, it is not something that just occurs. Instead, nature has built all sorts of checks and balances into the process. This is how Chilli seeds germinate:

In the first place, a period of dormancy must have been experienced. This dormancy is a period when a seed stays inactive. It “sleeps” even though conditions may be optimal. Nature does this to avoid seeds germinating in unfavourable conditions. It also wants to ensure that seedling has reached the right maturity for germination

After this condition has been met, other requirements need to be fulfilled. For example, the quality of the seed must be good; moisture levels must be right; the soil temperature must meet the seeds expectations; oxygen should be available, and all the inhibitors that prevent a seed from germinating will need to have been washed away.

Nature has pre-programmed the seed that all (or most) of these conditions need to be met for successful germination. Unfortunately, nature is not kind to seeds. With so many boxes that need to be checked out in the wild, a Chilli plant can produce thousands of seeds in the expectation that only a handful will germinate. The going is made so challenging that this is all the plant can hope for. As a result, the chances of a seed germinating in the wild are pretty slim.

However, with seeds started at home, the odds are reversed. We can emulate the conditions seeds might have faced in the wild, and provide the ideal growing conditions for germination. Indeed, the possibility of a seed failing when started under these ideal conditions becomes the exception rather than the norm.

Read more

Hydrogen peroxide. The magical elixir

H2O2 and Chillies

Hydrogen peroxide is a combination of hydrogen and oxygen. In essence, it is oxygenated water. It is a clear colourless liquid, resembling water, but is slightly thicker and denser. It can have a pale blue colour in its pure form. Hydrogen peroxide comes in various concentrations, from 3 percent to 100 percent. In its lower concentrations, it is used domestically as an antiseptic, a component in bleach, a water purification agent, and as an ingredient in cleaning products. At these lower concentrations, hydrogen peroxide also has many beneficial uses in growing Chillies

It is a pest killer that hydrogen peroxide comes into its own in growing Chillies.  At a three percent concentration level, it can be used to kill fungus gnats. Fungus gnats are a constant source of bother in growing Chillies. Not only are they annoying, but in their adult form fungus gnats pose a risk to seedlings. They can carry pathogens like Pythium, which cause damping off. Damping off is a condition that causes seedling stems to become weak, causing them to topple over.  Once damping off takes hold, it can rapidly spread and wipe out whole batches of seedlings. Is thus something to avoid. And this is where hydrogen peroxide steps up to the plate

While hydrogen peroxide can be used to kill pests, it is not a chemical pesticide in the stricter sense of the term. Once it has done its work, it breaks down into its main components – water and oxygen. It is almost that it has been there to perform a task, and then it disappears, without leaving any sign of it ever having been around

Read more

How get rid of fungus gnats


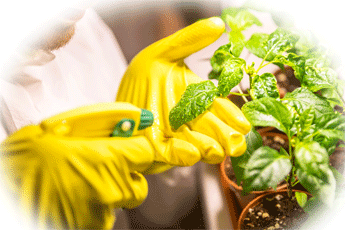
Getting rid of the gnats

No matter how much I try, I am just not able to get rid of fungus gnats completely.  I have used various methods to control them, but somehow, they just keep reappearing.  Not only are these little pests annoying, but they can also carry diseases like Pythium to seedlings. Pythium can be a real killer, particularly if seedlings share a common source of water. It can knock off a whole batch of seedlings in no time at all

As I have just started a lot of seeds for the 2022 Chili growing season, the time has come to tackle fungus gnats once and for all. I will use my existing methods to limit their numbers, but I also want to find ways to get rid of them forever. To do that, I will be doing a little research

Before doing that, however, the question needs to be asked. Just what are fungus gnats? They are the little black flies you will see hovering around flowerpots in doors, when plants have been overwatered. These little two-to-three-millimetre flies are also known as sciarid flies. They lay their eggs in wet compost or potting soil. When their larvae hatch, they feed on the fungus that develops when soil is too wet. While it is unlikely that the larvae will harm the roots of seedlings, they post the biggest risk when they grow into adult flies.  It is then they are known to carry pathogens like Pythium (which causes damping off) on their feet.  They transfer the disease when they fly from plant to plant

Read more

Soaking seeds. Is it necessary?

Speeding up germination

As with many things in growing Chillies, you will find different schools of thought on various subjects.  The soaking of seeds to improve germination is no exception. There are views on how long the seeds need to be soaked for, what liquid they should be soaked in, and a whole lot more. To try and figure out what the real 
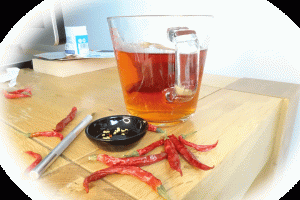
truth is, I thought I would do some research.

The first question I wanted to be answered is, is soaking seed necessary at all? According to much of my research, probably not. Seeds can be started successfully, without pre-soaking them. However, pre-soaking definitely improves Chilli growing. It speeds up sprouting and germination rates. And this is not just for any old reason. Soaking seeds emulates what happens in the wild.

In the first place, Chillies have a built-in inhibitor that prevents them from germinating inside ripe fruit. They will not germinate unless nature comes to their aid. When it rains, the inhibitors are washed away. Soaking seeds helps do that.  After that, other factors come into play before the seed will germinate.

Read more

The growing season has begun

An unexpected surprise

So, the 2022 Chilli growing season officially began for me today.   Even though I had prepared for it, at the last moment the start of the season went pear shaped. I had followed my own advice and placed the seed into the refrigerator for three days. Also, as part of an experiment, I also put the same varieties into a deep freeze.  I did this to find out whether cooling or freezing seeds is better for seed starting

After wrapping the seeds in aluminium foil, I placed them individually into seed tray inserts in mini seed starter trays with lids.  The inserts consist of twelve 
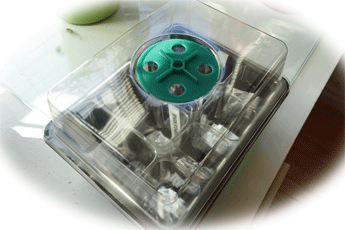
cavities. I faithfully labelled each cavity with the variety it contained. The covered seed starter trays were then placed into the fridge and deep-freeze. The seeds were taken from the fridge and deep-freeze after three days. They were brought to room temperature, and I then poured weak Camomile tea into the trays. It was at that point, the unexpected happened.

Where I thought the seeds would remain in their individual cavities, they decided to go wandering. I had not realised there was a gap between the seed tray inserts and the bottom of the trays. Thus, the seeds didn’t stay where they should have. They escaped from a hole in the bottom of the seed insert cavities. What I was left with was a pool of water with Chilli seeds of various sizes floating in a pool of water at the bottom of the seed trays. I was now faced with the fact that I had a whole bunch of perfectly viable Chili seeds, but I was unable to tell the one from the other.  What a way to start the Chilli growing season!

Read more

Chilli seed starting. Using a fridge?

To freeze or to chill?

My last post was about starting Chilli seeds. In it, I mentioned that before starting seeds, you should use a fridge to refrigerate them, for three days.  This is something I recently started doing. It is something recommended by no less than the creator of the Carolina reaper in his seed starting guide. The idea behind placing the seeds in 
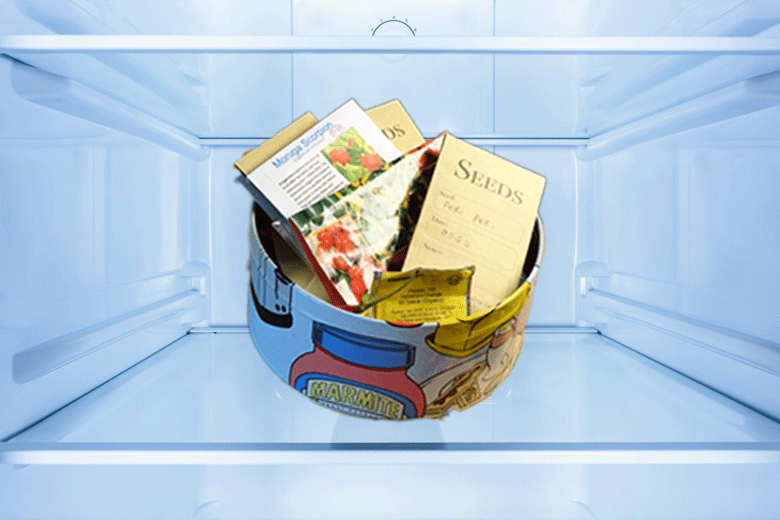
the fridge is to trick them into thinking it’s winter. Some schools of thought even recommend placing the seeds in the deep freeze to achieve this reaction.  I thought I would do some research on the subject. What is best; to cool or to freeze?

While it is likely that some seeds will germinate faster if placed in the deep freeze, particularly plants that grow naturally in cold weather climates.  But does this apply to Chillies?  They originated in the Amazon basin (in Peru and Bolivia), after all, and certainly don’t like the cold!

My understanding is that the Amazon basin is a part of the world that doesn’t get very cold. If that’s the case, why should I need to put my seeds in a deep freeze? I am sure the Amazon basin never gets to – 20 degrees Celsius as our deep freeze does?

Read more

Growing Chillies for beginners

Completely new to growing Chillies?

Okay, so you’ve never planted anything in my life. You received a packet of Chilli seeds from a friend, and you want to sow the seeds without doing a lot of research. You also don’t want to go to too much expense. All you need is a little solid advice on how to grow your Chilli seeds. Sound familiar? Relax, we have you covered. Follow this no frills guide to starting Chilli seeds, and you will be on your way in no time at all.

So what do you need? Some stuff is definitely required, but there is no need to spend a lot at your garden centre or online. Stick to the basics, at first. In time, you can get fancier if you like

At the very least, I would recommend a closed dome propagator, some eggs, a 
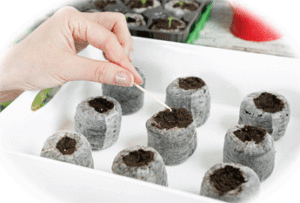
cardboard egg tray or two, a small bag of general-purpose seed starting compost, a plastic spray bottle, some wooden ice-cream sticks or similar, a marker pen, a teabag (camomile if possible, but normal will do), a spoon and separate seed tray). A heat mat, small bag of vermiculite, and some capillary matting are optional. You also need the seeds, of course. If you have all these things together, you will be on the path to success.

So what will all this cost? A quick search online revealed it would cost about £7.00 for a propagator, £15 for a heat mat (optional), 50p for a spray bottle, £ 6 for a bag of vermiculite (optional), a 10-litre bag of seed starting mix £5.50, £2 for capillary matting (see below) and a gravel tray £2.30. I would assume you already have a spoon, ice cream sticks, a marker pen, eggs and egg trays at home. So the total setup cost for the bells and whistles version is about £40.  Without the heat mat and vermiculite, it will cost about £18.00 (£16 without the capillary matting)

This may seem a lot to plant, just a few seeds, but the assumption here is that this will not just be a once off. The equipment and materials can be used to start many batches of seeds. Call it an investment in infrastructure.

Read more