Sweet Chilli chicken wings

Some history

The history of crispy chicken wings, particularly those paired with a sweet chilli sauce, is rooted in a blend of culinary traditions from around the world. The concept of frying chicken has been a staple in various cultures for centuries, with the Chinese, Scots, and West Africans all having their versions of fried chicken.

The modern popularity of chicken wings can be traced back to the United States in the mid-20th century. Specifically, the creation of Buffalo wings in Buffalo, New York, in 1964, marked the beginning of the chicken wing craze. This originalCooking with Chillies. Hot sauces version featured deep-fried wings coated in a spicy vinegar-based cayenne pepper hot sauce and served with celery sticks and blue cheese dressing.
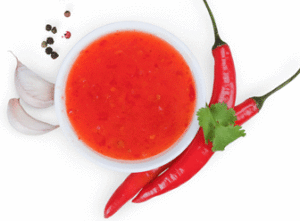
Sweet chilli sauce, on the other hand, has its origins in Southeast Asia, particularly Thailand. This sauce, known for its balance of sweetness and heat, is traditionally made from red chillies, vinegar, sugar, and garlic. It is widely used as a dipping sauce and in various dishes across Asian cuisines.

The combination of crispy chicken wings with sweet chilli sauce likely emerged as part of the global fusion cuisine trend, where chefs and home cooks began blending elements from different culinary traditions. This fusion dish captures the essence of American comfort food and the vibrant flavors of Southeast Asian cuisine, resulting in a deliciously satisfying dish. Today, it is a popular appetizer and party food enjoyed by people all over the world, showcasing the versatility and universal appeal of both crispy chicken wings and sweet chilli sauce.

Read more

Chilli in Vinegar recipe

A Global Culinary Tradition

Chillies in vinegar is a widespread practice across many cultures, each adding its unique twist to this age-old preservation method. By immersing chillies in vinegar, their shelf life is extended significantly, allowing people to enjoy their fiery flavour long after the harvest season. This method not only preserves the chillies but also transforms them into a versatile condiment that can be used in various culinary applications. The resulting mixture adds a distinctive heat and tang to countless dishes, enhancing flavours and introducing a delightful kick.

The practice of preparing chillies in vinegar is deeply rooted in the culinary traditions of many regions. Each culture has developed its unique way of preparing and using pickled chillies, reflecting local tastes, available ingredients, and culinary customs. In some regions, the process involves adding spices, herbs, or other vegetables to the vinegar brine, creating complex flavour profiles that go beyond the simple combination of heat and acidity. This customisation showcases the creativity and resourcefulness of different culinary traditions.
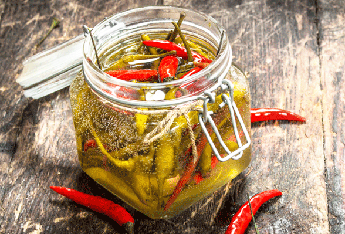
In Southeast Asia, for example, chillies in vinegar are a common sight in many households and restaurants. Thai “Prik Nam Som” and Vietnamese pickled chillies are just a few examples of how this condiment is used to enhance noodle soups, stir-fries, and other dishes. In Latin America, Mexican “escabeche” and Peruvian “rocoto en escabeche” illustrate the region’s love for combining chillies with other vegetables and spices to create colourful and flavourful accompaniments. Each preparation not only preserves the chillies but also elevates the dishes they accompany.

Similarly, in the Caribbean, Europe, the Indian subcontinent, and beyond, chillies in vinegar hold a special place in the culinary landscape. From Trinidadian “pepper sauce” and Hungarian pickled cherry peppers to Indian  pickled  chillies  and 腌制辣椒 ( Chinese pickled chillies) , these condiments bring a burst of flavour to everyday meals. They are used to add heat and acidity to various dishes, from simple snacks to elaborate feasts. This global appreciation for chillies in vinegar underscores their versatility and enduring appeal in cuisines around the world.

Read more

Pickled Chillies

[wpseo_breadcrumb]


Pickled Chillies
 
Author: 
Nutrition Information
  • Serves: 50
  • Serving size: 15g
  • Calories: 1
  • Fat: 0 grams
  • Saturated fat: 0 grams
  • Unsaturated fat: 0 grams
  • Trans fat: 0 grams
  • Carbohydrates: 0 grams
  • Sugar: 0 grams
  • Sodium: 0 grams
  • Fiber: 0 grams
  • Protein: 0 grams
Recipe type: Chilli pickles
Cuisine: International
Prep time: 
Cook time: 
Total time: 
Pickled Chillies are very easy to make. All it takes is bring some vineagr to the boil. Pour this over topped Chillies in a jar and that's it. Job done. Use a pickling vinegar to improve the flavour. Chopped onions and picking spices may also be added to provide another dimension. Any Chiliies can be used but milder varieties like Jalapenos or Banana Chillies are particularly good when pickled
Ingredients
  • Chillies – 500 grams
  • White vinegar – one cup (see notes)
Instructions
  1. Wash the Chillies. Use a paper towel to dry them. Make sure that all moisture is eliminated.
  2. Cut the stalks off the Chillies
  3. Bring the vinegar to boiling point on the stove. Remove and allow to cool slightly
  4. Sterilize a jar by washing it in hot soapy water. Rinse under the tap until all the soap suds have been removed. Allow to air dry
  5. Fill the jar with the Chillies
  6. Pour the slightly cooled vinegar over the Chillies
  7. Allow to rest so that any air bubbles rise to the surface.
  8. Place the lid on the jar. Turn it upside down and upright a couple of times to bring any trapped air to the surface.
  9. Open the jar again to release any air that has risen
  10. Seal the jar again. Place in a cool place for about six weeks.
  11. After the six-week period the Chillies will be ready to be eaten.
Notes
For best results use a pickling vinegar.

Instead of using vinegar the Chillies can be fermented in a brine solution. This process will create it own acetic acid and preserve the Chillies

Keywords: Pickled Chillies

Chicken rub with Chillies

Chicken rub with chillies
 
Author: 
Recipe type: Powders, rubs and flakes
Cuisine: International
Prep time: 
Total time: 
Great tasting chicken rub that adds amazing taste to grilled, roasted or barbequed chicken, Rub the chicken and then allow it to rest for about 3o minutes before cooking. Be careful to ensure that the temperature you are cooking at is not too high because the sugar in the recipe may cause burning. You are looking to caramelise as opposed to blacken!
Ingredients
  • Chilli powder – two tablespoons ( see note)
  • Kosher Salt – 4 tablespoons
  • Black pepper – 4 teaspoons
  • Garlic powder- 2 teaspoons
  • Onion powder – 2 teaspoons
  • Celery salt – one teaspoon
  • Paprika – four tablespoons
  • Brown sugar – three tablespoons
  • Thyme – one teaspoon
Instructions
  1. Combine all the ingredient in a mixing bowl. Mix well
  2. Use what is required for your current dish and store the rest in an airtight bottle
  3. Allow to rest on chicken, meat or fish after coating for about 30 minutes before beginning grilling, roasting or barbequing
Notes
This Recipe is based on a reasonably hot Cayenne strength chilli powder. If you want a softer taste, use a milder chilli powder. If you like it hot, Habanero or Scotch bonnet chilli powders will do an excellent job!

Keywords: Chicken rub with chillies


Spicy low carb pizza

Spicy low carb pizza
 
Author: 
Nutrition Information
  • Serves: 4
  • Serving size: 285 g
  • Calories: 674
  • Fat: 34 g
  • Saturated fat: 15 g
  • Unsaturated fat: 9 g
  • Trans fat: 0 g
  • Carbohydrates: 12 g
  • Sugar: 3 g
  • Sodium: 1621 mg
  • Fiber: 1 g
  • Protein: 51 g
  • Cholesterol: 120 mg
Recipe type: Low carb
Cuisine: International
Prep time: 
Cook time: 
Total time: 
For anyone on a Low Carb or Keto diet , this pizza is a real winner. It looks like and tastes virtually the same as pizza made with wheat flour but minus the carbohydrates. In addition to being very flavourful , this spicy pizza is also gluten free and a vegetarian option.
Ingredients
For the dough
  • Whey powder – 125 grams (unflavoured)
  • Mozzarella cheese – 75 grams (dry, grated) -see note.
  • Full fat cream cheese – 50 grams
  • Olive oil – 60 ml
  • Large egg – one
  • Salt – ½ teaspoon
  • Parmesan cheese – 100 grams

Other
  • Passata - 4 tablespoons
  • Chilli flakes – one teaspoon
  • Olive oil –one teaspoon
  • Cheddar cheese – two cups (shredded)
  • Bell peppers - one large (stalk, seeds and pith removed. Sliced into strips)
  • Red chillies – three I finely chopped)
  • Garlic – two cloves (finely chopped) - optional
  • Olives - two tablespoons pits removed (optional)
  • Mushrooms - ½ of a cup sliced (optional)
Instructions
  1. Preheat the oven to 180 degrees Celsius
  2. Heat a teaspoon of oil in a pan. Add the chillies, garlic and bell pepper. Sauté until done. Remove from the heat.
  3. Combine all the ingredients under for the dough into mixing bowl or mixer with a dough mixing attachment
  4. Mix all the ingredients into a thick dough
  5. Roll out into one large pizza or divide the dough ball into 4 to make small individual servings
  6. Roll up the edges to create a border (optional)
  7. Place on non-stick sheets like Teflon or silicon, on a baking tray
  8. Place in the centre of the preheated oven and cook for 10 to 15 minutes until golden brown.
  9. Remove from the oven.
  10. Top the crusts with passata using a brush or a spoon
  11. Add the fried chillies, garlic, olives, mushroom (if using) and bell peppers.
  12. Top with cheese. Sprinkle with chilli lakes and place back into the oven
  13. Cook until the cheese has melted.
  14. Serve
Notes
Use only dry mozzarella. The varietys in water are not suitable for this recipe

Keywords: Spicy low carb pizza

Serves: Four portions


Basic Chilli vinegar

[wpseo_breadcrumb]


Basic Chilli vinegar
 
Author: 
Nutrition Information
  • Serves: 50
  • Serving size: 15g
Recipe type: Vinegars
Cuisine: International
Prep time: 
Cook time: 
Total time: 
Fewer recipes are easier to make and provide the amount of flavour that this one does. It is simply a matter of steeping washed chillies in warm vinegar for about six weeks and you're away. Serve with just about anything, but it is particularly good on chips, pies and collards. It is also great to add that bit of something special to stews and casseroles.
Ingredients
  • Chillies - 500 grams
  • White Vinegar - approx. 250 grams ( see note)
  • Bottle ( s) with tapered neck and caps (see note)
Instructions
Pre-preparation
  1. Wash Chillies and dry. Allow to rest on a kitchen paper towel to ensure that any moisture is eliminated.
Making the Chilli vinegar
  1. Bring vinegar to just below boiling point in a microwave or on the stove. Do this is in a Pyrex jug in the microwave or pour into same ,if done in pot
  2. Fill the bottle(s) with as many chillies as you can get in, but leave a little space ( about an inch ) at the top in the neck
  3. Pour in the vinegar until it covers the chillies. Allow to rest for 5 minutes so that any trapped air can rise to the surface.
  4. Place the cap on the bottle and turn upside down and upright a couple of times.
  5. Re-open the bottle to allow any air that has risen out
  6. Close the cap and place the bottle (s) in a dark place like a pantry for a minimum of six weeks to allow infusion to take place.
  7. Start using on just about everything you cook or eat. The chillies can be used in the same way as any pickled chillies might be
Notes
*This recipe is more about personal judgement than being able to provide precise quantities. Because bottle sizes and the amount of chillies used will vary . the quantities given are purely and indication of what will be needed.

It is important to note though, it is best to fill the bottle with chillies otherwise they will float to the top, making it difficult to ensure that the chillies are completely submerged under the vinegar ( which is what you need to attempt to achieve)
** Using a tapered neck bottle serves two purposes. First that when the matured Chilli vinegar is being used, it makes it easier to pour. Secondly, the tapered neck will make it easier to prevent the floating of Chillies to the surface when pouring the vinegar

Keywords: Chilli vinegar


Rib rub with Chilli flakes

Ultimate rib rub with Chilli flakes
Nutrition Information
  • Serving size: 100g
  • Calories: 156 kcal
  • Fat: 14g
  • Saturated fat: 3.3g
  • Carbohydrates: 3.4g
  • Sugar: 2.3g
  • Sodium: 0.52g
  • Fiber: 0.5g
  • Protein: 4.6g
Recipe type: Powders, rubs and flakes
Cuisine: International
Prep time: 
Cook time: 
Total time: 
Ingredients
  • Brown sugar – ¼ cup
  • Sweet paprika powder – 2 teaspoons
  • Black pepper (coarsely ground) – 2 teaspoons
  • Garlic powder – 1 teaspoon
  • Kosher salt – 2 teaspoons
  • Yellow mustard powder – 1 teaspoon
  • Onion powder – 1 teaspoon
  • Chilli flakes – 2 teaspoons (see note)
Instructions
  1. Place all ingredients in a spice grinder with the exception of the chilli flakes. Grind until any lumps have been removed
  2. Add chilli flakes and mix well
  3. Use as required and store any remaining rub in an airtight container
Notes
The heat of the chilli flakes that you use will be according to personal taste. Using flakes like Aleppo, Gochogaru and smoked Jalapenos will give you a mild result.

Using hot flakes like Birds-eye, Serrano’s or Cayenne may mean that you want to tone down how much you want to use. When working with the hotter chillies, start with a teaspoon. You can always add more when you serve the ribs but certainly won’t be able to remove the heat if you have put in too much

Keywords: Rib rub with chilli flakes


Easy to make Chilli powders


Homemade Chilli powders
Nutrition Information
  • Serving size: 100g
  • Calories: 0 kcal
  • Fat: 14g
  • Carbohydrates: < 0.5 grams
  • Sugar: 7.2 grams
  • Sodium: 0.07 grams
  • Fiber: < 0.5 grams
  • Protein: 14 grams
Recipe type: Powders, rubs and flakes
Cuisine: International
Prep time: 
Cook time: 
Total time: 
Making home-made chilli powders is really easy. It is simply a matter of grinding dried chillies into a fine powder using a spice mill. It is great fun to experiment with chilli powders by mixing different chilli varieties to achieve your perfect blend. Bottle the ground powders and add a custom label or a ribbon and you have a fantastic gift for a friend or family member
Ingredients
  • Dried Red chillies – any quantity
  • Salt - as required
  • Other ingredients that you may wish to add eg garlic flakes
Instructions
  1. Remove stalks
  2. Place chillies in a mill and grind until finely ground
  3. Place in an airtight container. Use as required
  4. For hotter powders use chillies like Scotch bonnets, Birds-eye or Cayenne.
  5. Milder versions can be made with chillies like Kashmiris, which are excellent for giving curries their characteristic red colour
  6. An example of a great blend is Cayenne and Kashmiri, where if ground together in a ratio of 5 Cayenne to 2 Kashmiri chillies, With a little salt added, you will get a fantastic general purpose chilli powder
  7. Indeed, not only can you add salt, but experiment by adding garlic/onion flakes or asafoetida powder for some interesting home-made Chilli powder results
Notes
It is essential that the chillies are completely dry before grinding is undertaken

If you want a milder chilli flake remove the seeds and white pith

Keywords: Home-made Chilli powders

For recipes to make rubs for barbeques click here


Chilli flakes

Homemade Chilli flakes
 
Author: 
Nutrition Information
  • Serving size: 100g
  • Calories: 0 kcal
  • Fat: 14 grams
  • Carbohydrates: < 0.5 grams
  • Sugar: 7.2 grams
  • Sodium: 0.07 grams
  • Fiber: < 0.5 grams
  • Protein: 14g
Recipe type: Powders, rubs and flakes
Cuisine: International
Prep time: 
Cook time: 
Total time: 
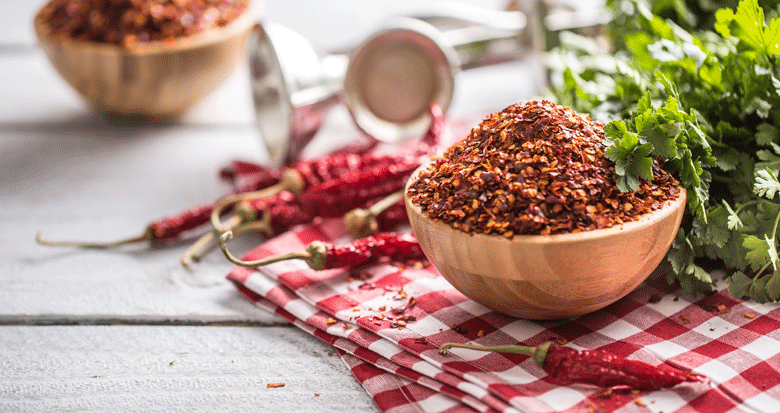
Chilli flakes are made by coarsely grinding dried chillies as opposed the fine milling required by chilli powders. It is simple to do and fun to experiment with blending different chillies to achieve different flavour profiles. Mild and hot chillies can be combined to take the heat out of but yet retain the flavour of some of the higher contenders on the Scoville chart!
Ingredients
  • Dried Red chillies – any quantity
Instructions
  1. Remove stalks
  2. Place chillies in a mill and grind until coarsely ground
  3. Place in an airtight container. Use as required
  4. For hotter flakes use chillies like Scotch bonnet, Ghost peppers, Birds-eye or Cayenne. Milder flakes can be made with Kashmiri, Aleppo or Jalapeno chillies
  5. Gochugaru , Korean red chilli flakes are produced from air-dried (taekyung) Hong gochu chillies. This is fairly mild, whereas a spicier version is made from Cheongyang gochu.
Notes
Chilli flakes are great for seasoning pizzas, pastas and eggs but can also be used add flavour to a multitude of everyday meals

Gochugaru is liberally used in Korean cooking as a general condiment and also to flavour dishes like Kimchi and Yukgaejang

It is essential that the chillies are completely dry before grinding is undertaken

If you want milder chilli flakes remove the seeds and white pith

Keywords: Chilli flakes


Basic Chilli Oil

[wpseo_breadcrumb]

Basic Chilli oil recipe

Basic Chilli Oil
Nutrition Information
  • Serves: 36 tablespoons
  • Serving size: 100g
  • Calories: 785kcal
  • Fat: 87g
  • Saturated fat: 12g
  • Carbohydrates: 0.5g
  • Sugar: 0.5g
  • Sodium: <0.1g
  • Fiber: <0.1g
  • Protein: <0.5g
Recipe type: Chilli Oils
Cuisine: International
Prep time: 
Cook time: 
Total time: 
Sometimes recipes are so generic you can find a similar version of the same thing in most countries of the world. This recipe is just that, but one thing that it does do that a lot of others don’t , is use fresh Chillies. In this particular recipe, I have used habaneros but it will work just as well using any other Chillies. If you like it hot use a hot Chill, if you want it red - red chillies should be your choice. Want green oil or one with a note of garlic? It’s up to you. The only thing that can limit you is your imagination
Ingredients
  • Olive oil – 2 cups
  • Fresh habaneros – 4 to 6 ( or any other chilli)
Instructions
  1. Wash and cut the habaneros in half
  2. Pour the oil into Pyrex (or similar) jug and add Chilies. Make sure that the jug is big enough to hold Chillies and oil and still has plenty of space to the top.
  3. Cover with a paper towel and secure with string.
  4. Microwave on high until the oil almost boils. This will only take minutes and will need to be watched carefully to ensure that the oil does not boil and bubble over the side of the jug. Continue processing until the right level of infusion has been reached. Be extremely careful
  5. Once heated, allow to cool.
  6. Place into the refrigerator and wait until the mixture solidifies.
  7. Sieve into a sealable jar or jug, removing solid bits.
  8. Store in the fridge upside down until the mixture solidifies
  9. Pour off any water that may have accumulated. Allow to remain at room temperature until the oil has returned to a fluid state
  10. Pour into a sterilized bottle or jar. Seal
  11. Keep in the refrigerator. Consume in 7 to ten days
Notes
Adapted from a recipe by Stella Cooks

Keyword: Chilli infused oil

Link button